 BY TAYLOR MABELITINI
Contributor
Classes are back in session, and in turn campus is flooded with clubs, teams, and student organizations all clamoring to hand out the same thing — the ubiquitous free T-shirt. Any student who has spent time in the current education system is guaranteed to have a stockpile of them in their closet, left to grow dusty and unworn, save for when oil-changing day or painting the living room comes around.
So what’s to be done with all this excess apparel, boasting catchy slogans or graphics from late 2007? Three letters: D. I. Y. With simply a little creativity and kitchen scissors, any free T-shirt can be transformed into a unique statement piece, perfect for a day at the gym or for those style ruts of tired Monday mornings. But first, one must figure out what they want from their t-shirt – A simple muscle tank? A cute workout shirt? Something with a little more flair, like a cutout tank or braided top? We here at The Voice have put together a few easy DIY’s to get inspired with, additional photos found online at www.washtenawvoice.com.
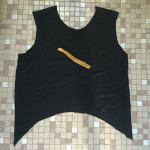
- For this DIY, you’ll need a T-shirt of your choice, scissors, and a small piece of fabric or ribbon in the color of your choice. Cut the sleeves and neckline, then cut the bottom of the shirt in an asymmetrical arch shape.
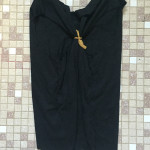
- Flip the shirt over. Take your ribbon or piece of fabric, and thread it through the two armholes you’ve created. Grab both ends of the ribbon or fabric and tie it in a bow or knot, cinching the back of the tank. You now have your new t-shirt top!
- For this DIY you’ll need a free T-shirt, scissors, and ribbon or fabric scrap in the color of your choice.
- Cut the neck and sleeves off of the T-shirt and then cut an asymmetrical arch into the hemline of the shirt.
- Flip your T-shirt over to the back side.
- Tie the ribbon or fabric scrap around the T-shirt back, slipping it between the armholes you’ve cut and securing it in a knot or bow.
- Flip your new DIY T-shirt back over and admire your handiwork!
- For this DIY you’ll only need aTt-shirt of your choice and scissors. First, cut the sleeves and neckline off of the shirt.
- Cut the front of the shirt across at the hips, leaving the back intact. Then, cut the back up the middle to the point where you cut the front of the shirt horizontally.
- Take the two flaps that you’ve made at the back of the shirt and cut them diagonally into points.
- Take the two pointed flaps and tie them together. All done!
- For this DIY you’ll only need a free T-shirt of your choice and a pair of scissors.
- Cut off the neck and sleeves of the shirt.
- Cut the front of the shirt horizontally a quarter of the way up, leaving the back intact.
- Cut the back of the T-shirt vertically from hem until it is even with the front of the T-shirt
- Cut the two flaps you’ve made diagonally to the edges of the shirt.
- Take the two flaps and tie them together. Enjoy!


